|
|
#11 |
|
3" Exhaust
Join Date: Mar 2007
Location: Wisconsin
Posts: 214
 |
man, just looking at your pics again, that car looks fucking mint. I would baby the shit out of that thing. Another thing that is really cheesy but I always use now are those sun-shields that go in your windshield. Protects the inside of your car from the sun. They are cheap as hell and will save your dash/seats etc.
|
|
|

|
|
|
#12 | |
|
Intake
Join Date: Jul 2007
Location: Delete Profile
Posts: 48
 |
Quote:
__________________
Delete Profile |
|
|
|

|
|
|
#13 | |
|
3" Exhaust
Join Date: Mar 2007
Location: Wisconsin
Posts: 214
 |
Quote:
|
|
|
|

|
|
|
#14 |
|
3" Exhaust
Join Date: Mar 2007
Location: Wisconsin
Posts: 214
 |
Detailing 101. The detailing section on our forum is the weakest shit i've ever seen. I'll try to do a write up here.
There are tons of different products and methods out there, and ultimately you have to find out the right one for you paint and your car. What works wonders for one person might not work so great for another. in my opinion meguiars makes the best car detailing products. In this post i'll try to focus on the products for your car exterior. The steps we will be covering are: Wash Clean Polish Wax Sounds like a quick job, but it can take hours and hours to get show-room quality looking paint. Here is a list of the products that i suggest you use: Meguiars Gold Class car wash. There are different more expensive car wash soaps from them, but this one does a great job and theres really no need to go extreme, since the wash is just getting the preliminary dirt off of your car. 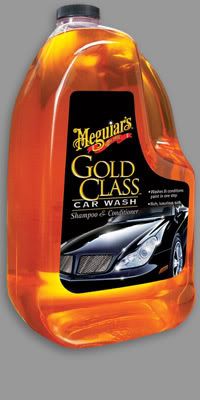 With the soap you want to make sure you get a microfiber mitt or a sheepskin mitt because you do not want to scratch your paint. These won't be scratches you can see just looking right at your car, but scratches that will show up in sunlight that look like little swirls. What you want to do with the soap is put it in a nice CLEAN bucket (Again, the more crap that you pick up on your mitt, the better chance you get scratches). The bottle will tell you how much to use, but you can be generous with how much you use. When the soap is in the bucket, use your garden hose with an attachment and spray the water into the bucket to make suds with the soap. Before you start applying the soap to the car, you want to make sure that you giveit a good soaking so that your car is nice and wet all over. Then just dip your mitt into the soap and get it all nice and soapy and run it over a section of your car. You will want to start from the top down and only do a section at a time (you could get away with an entire side of the car. I usually break it into front, left, right, back, but you can do smaller sections if you want). ****Edit: If you finish a section of your car with the mitt and notice that it is brown or dirty, take it away from the car and spray it with the highest pressure setting on your hose (again, away from teh car) so that the dirt gets washed away. The moral of the store is the less dirt touching your car the better, just watch out for it.**** IT is also a good idea to try and wash your car in the shade if you have any (like starting early in the morning) because when the sun is out it will dry the water very quickly and leave spots on your car. Once you soap up a side, make sure you rinse it off with your hose (i like the flat spray setting on most hose attachments, i wouldn't reccommend a pressure washer b/c after so many washes it will start to weaken your paint) and rinse from the top down. There is no need to dry your car off just yet. Just make sure that when you are cleaning the other sections of your car, keep the previously cleaned sections nice and wet to avoid spots again. Then when you have finished with the entire car, get out your microfiber cloths. http://www.target.com/gp/detail.html...sin=B000E48IUG That link is an EXPENSIVE example. I've found ten packs at target for 5.99 before. You will need A LOT OF CLOTHS. I would recommend 40-50 cloths, but you can go a little less if you are not picky. EDIT: I mentioned rims in the end of my next post, but now is a good time to clean the rims with the product i mention. This will just clean them up and you will be spraying them and scrubbing them so better do it now then when you car has all that nice product on it :-D If you have chrome rims or special rims that need a different product just follow the directions on the bottle that you buy. I don't have anything but aluminum rims so thats all I can talk about really :-\ Take your cloths and dry off your car. You don't have to be picky in a drying method, just get all the water off and if you see and spots give it a quick spray with the hose and wipe it dry with a cloth. When you are all done drying the car, pull it into your garage. (the reason you pull it into the garage is b/c of the shade and hopefully b/c its a little cooler. The products will go on your paint better if it is not hot) At this point you are ready to start babying your paint :-D It is a lot of hard work but definitly pays off in the end. EDIT: USE YOUR WINDOWS TO LEAN YOUR WEIGHT ON AND TO PUT YOUR HANDS ON TO HOLD YOURSELF UP AND BALANCE YOURSELF. Try to avoid touching yoru paint alltogether, i found that the windows are a good substitute and can give you leverage for working on any part of the car. Plus, they are the last thing you will clean, so don't worry. Cleaner For the next step use the Mequiars Auto Detailing Clay Kit 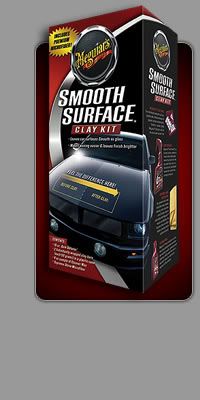 With the kit you will get clay bars and some quick detailing spray. This part will prob. take you the longest out of all the steps. What you will want to do is take out your clay bar and kneed it in your hands while spraying the quick detailer on it. You want to keep the clay bar nice and wet as you are using it on your car. When the clay is nice and kneeded and moist, take the quick detailer and spray it on a section of your car. Then take your clay bar and work it into your paint. You can press hard with this stuff, but use your judgement. Theres no reason to go rambo on it, just give it a little force and rub up and down or in circles or side to side, it won't matter, essentially you are just picking up the little bits of dirt off the car that the soap couldn't get. Do a little section at a time (maybe a 1ft X 1ft section) and when you are done wipe it clean with a microfiber cloth. The reason you want so many cloths is so you NEVER use a dirty cloth on a part of the car. The dirt from the cloth can scratch your paint. Now just go throughout your entire car doing this. If you are picky it could take well over an hour, but trust me it is worth it. After you finish a section run your fingers over the paint, or the back of your hand on it. It will feel like you just got a new paint job. It won't look like it yet, but it will feel like it. Another cleaner option is called Scratch-X 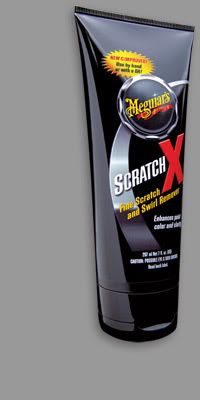 With this product, you want to make sure that you use an applicator pad. 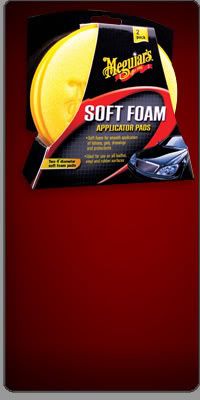 you will put a decent amount of scratch-x onto the applicator pad and then rub it into your paint. AGain you want to pick a small section of your car to do this. Maybe a 3'X1' section. And you will rub with a good amount of force. You can use a circular motion for this application, but can also use side to side and back and forth motions. I feel the circular is a bit more effective though. After it has been applied and worked into the car, try not to let it dry. Take a clean microfiber cloth and in circles wipe the scratch-x off the car. Make sure all the scratch-x residue is off, and switch to a clean cloth whenver you feel necessary. This will take a long time again, but will be WELL worth it if you have ANY tiny scratches in your car. This product truly begins to show its benifit after 2-3 applications. Trust Me :-D Also, Feel free to use both the clay bar kit AND the scratch-x one after another. They both clean you paint, but also have different benifits, so if you have the time, use both :-D. I will post more later, my hands hurt :-D Last edited by D_Train; 08-07-2007 at 08:34 PM. |
|
|

|
|
|
#15 | |
|
Intake
Join Date: Jul 2007
Location: Delete Profile
Posts: 48
 |
Quote:
wow i Read it all, well so far i got this great brand of car soap im pretty happy with it. also got the micro Fiber Cloth's about 10 new still in the bag. wanted to know can i re use them ?? if i wash them or do i have to buy new ones each time i choose to wash my car which is usally every other weekend. Also in which order do i do the Clay Bar and the Scratch X ? You rock man i really appreciate you taking the time to write all of this. Take it easy and hopefully you finish before this weekend so i can test it out and let you know how it Goes for me.
__________________
Delete Profile |
|
|
|

|
|
|
#16 | |
|
3" Exhaust
Join Date: Mar 2007
Location: Wisconsin
Posts: 214
 |
Quote:
Inresponse to your questions, you can reuse your cloths, and here some people will tell you different things, but here's my opinion: If the cloth is clean, use it. i.e. if theres no visible dirt and no product wiped off on it, you can use it. I find the best thing to do is fold it in quarters when using it, because then you get a bunch of different sides to work on (you just keep folding it differently and flipping sides). Otherwise just wash it in your dryer. The ones that you wipe the wax off with you might want to hand wash so you dont f*ck up your washer/dryer, but i don't do much laundry so I donno if in fact you can wash/dry that stuff with machines. If it were me i would buy some more cloths (edit: i mean more than 10, you do not have to buy more cloths each wash) . They aren't the most absorbent things but they are so good to your paint so thats kind of the trade off. I used to run out of cloths when drying my car from the preliminary wash so thats why i've accumulated so many. "Also in which order do i do the Clay Bar and the Scratch X ? " Use the clay bar and THEN the scratch x. But you can use scratch X by itself w/o using the clay bar at all. The clay bar will get almost all the dirt off your car (you'll be suprised how much dirt gets on the clay while you are working) and i forgot to mention when using the clay bar, you will see it start to turn brown from dirt, just re-kneed it until you get a clean spot on the clay and continue. remember to keep it moist with the quick detailer that comes with it. The Scratch-x essentially takes off a MINISCULE (so so so super small) layer to get rid of the scratches. It is not bad for your paint and is also better than those other scratch products because all those do are fill in the scratches where scratch-x will permanently get rid of them (provided you wash your car properly) The clay bar you can do once/twice a year depending on how much you drive and how often you wash your car. Scratch-x you can use to your descretion. If you have no more scratches, switch to this other paint cleaner. 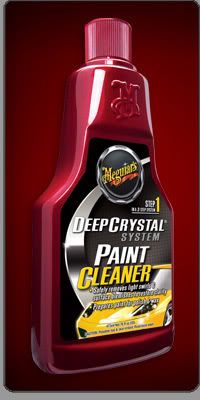 because if you don't have any more scratches there is no more point to the scratch x. Again, do the clay bar before the scratch-x. But both don't have to be used on every wash. You will want to eventually switch to the regular paint cleaner. |
|
|
|

|
|
|
#17 |
|
3" Exhaust
Join Date: Jul 2007
Location: Canada
Posts: 69
 |
someone sticky that* post!
Last edited by fulljapan; 08-07-2007 at 11:25 AM. |
|
|

|
|
|
#18 |
|
3" Exhaust
Join Date: Mar 2007
Location: Wisconsin
Posts: 214
 |
Ok, so we've covered the basic wash and clean so far. I have been recommending Meguiars products but I hate to sound like a broken record and if you have a product that you like better or that you want to try, by all means try it. Some paint will LOOOVE one product and other paint will only get so/so benefits from it. Meguiars is all around pretty good for most paint so thats another reason why I keep using it.
Ok, so onto the polish. We are going to be polishing by hand to start out with. After some experience I would recommend going out and purchasing a polisher. You will get a MUCH better polish with an orbital polisher, but don't worry. you will still get a niiiiiice clean finish by hand as long as you do things right. Don't just jump to a polish after you wash your car. Its easy to be impatient (believe me, I was) and just itching to get that paint shiny and glossy. you have to make sure your paint is clean. Thats why we go through the first two steps before polishing. This is the polish I use 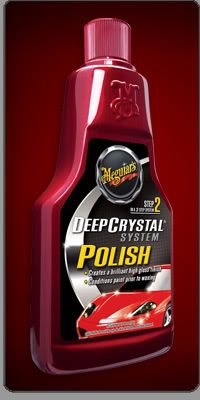 \ \Now, with this it is recommended that you get a slightly different applicator 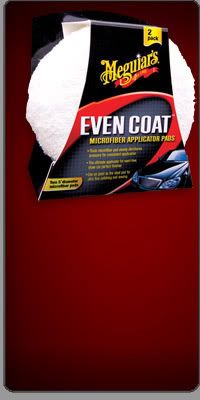 It is a little gentler and will apply the polish very well. You can use a regular applicator pad with this product if you want though. It won't be the difference between a good job and a shitty job, but you will be able to tell a slight difference. It's going to be the same old story with this, put some polish on the applicator pad and start with a section of your car. You want this stuff to sit for just a little bit. Maybe a few minutes after you are done applying it to the paint. there is no need to work it in super hard, the polish will come when you buff it out with your microfiber cloths. So to reiterate, apply the polish on an area and let it sit for about a minute. Take your microfiber cloth and buff out the area that you applied the polish. Go in circles with your cloth and you can press somewhat hard if you want. The polish is also designed to reduce the look of scratches so you don't run the risk of scratching your paint with a little too much force. Don't go conan the barbarian on it though. Polish the rest of the car. If you so desire do it again, right after the first run through. at this step you can see the end of the tunnel so its hard for me to polish again, but if you want picture perfect don't skip the second run-through. Wax You're ALMOST DONE!!!! 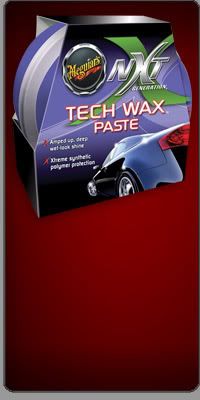 I think this is the easiest step. Use a regular applicator pad and twist it around in the wax. Apply it to your car. Its hard to describe the amount that you want on your car. You will just get used to it by doing. the first time i did applied wax it looked good. Then after it dried and I tried to buff it off I discovered it was WAYYYYY too much and was really hard to buff out. again this will be a learn-by-doing step, but don't get intimidated b/c you can't screw it up, its just that if it is too thick, it will be hard to buff out. Anyway, sorry about that tangent, you will be waxing your entire car at one time. the wax is supposed to dry. hopefully your car is still in the shade or in your garage. Apply and even coat of wax to your entire car. don't worry if you get it on the trim and stuff it won't hurt it, and you can clean it off later. I have had times where i get wax on parts of the car and its a b*tch to get off, but it has always come off in the end. after you apply wax to the whole car, make sure it has dried and come back with a clean microfiber cloth and buff off the wax. I hate doing this b/c i have weak arms (lol) but after a little while all the wax will be off. then you should wax again (especialy if you havn't waxed in a while). You don't have to wax your car every time you wash it. Maybe once a month or every 6 weeks depending on how anal you are about it. Almost almost done now. After the wax is off, go over your car with another set of eyes to see if you missed anything. There will definitly be a spot here and a spot there that you didn't wipe off or that has a smudge or two on it. your windows by this time will be all smudged up from you putting your weight on it so you don't have to touch your car with your hands. Just get a good glass cleaner for the way end and clean off your glass. I like stoners in the aerosol can: 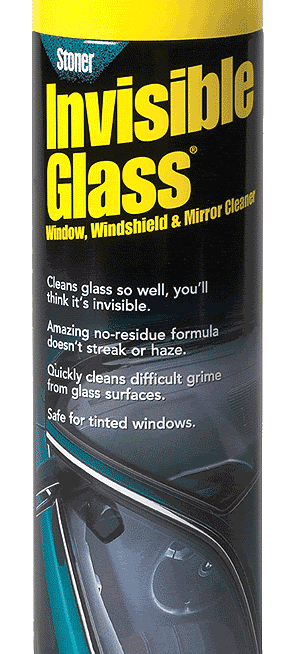 Some of the glass cleaner will prob. get on your paint, so just keep a clean cloth handy to wipe it off. Tires: Any tire shine is fine. The gel stuff will last the longest. Rims: This product sounds really cheesy, but it worked wonders for me and I didn't even scrub with a brush. With a hard bristle brush your rims will be clean. Maybe not shiny, but there will be almost no dirt, it works great! 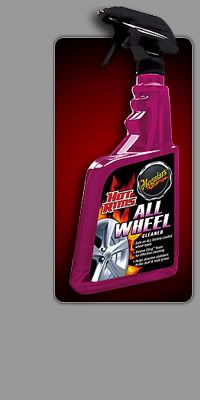 Congrats! your car is damn pretty. Please ask questions. I am terrible at explaining things and the more questions asked the clearer the message will be. |
|
|

|
|
|
#19 |
|
3" Exhaust
Join Date: Mar 2007
Location: Wisconsin
Posts: 214
 |
if you have been reading along i made some edits in the first post to watch out for.
|
|
|

|
|
|
#20 |
|
3" Exhaust
Join Date: Jul 2007
Location: Canada
Posts: 69
 |
My first impression is: holy sh*t, that's a long trip! I have seen the pictures of your car, shiny like a medal, but do you have any other?
Do you sometimes wash your car in a shorter lapse of time? Like by just keeping the basic steps.. if yes it would be nice to know wich ones |
|
|

|
 |
|
|
 Similar Threads
|
||||
| Thread | Thread Starter | Forum | Replies | Last Post |
| 1990 Supra Vs. 2002 Wrx Vs. 2001(ish) Mustang GT | Junkyard_Dog | Off Topic Forum | 2 | 07-28-2011 06:00 AM |
| Tein Lowering springs ride comfort? | sportriderseattle | MKIII Supra | 2 | 05-26-2009 07:31 PM |
| HELP PLEASE | Nick0887 | Non-Generation Specific Questions | 4 | 02-28-2009 07:26 AM |
| Mustang guys are so ignorant!! | Isphius | Off Topic Forum | 13 | 12-25-2006 03:29 AM |
| Supra 1986.5(non turbo) VS Mustang 1996 | Supra GuestBarbotte | Non-Generation Specific Questions | 4 | 03-19-2005 03:35 PM |